
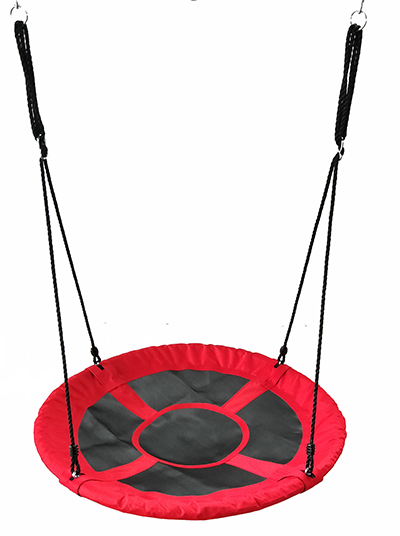
The kid swing assembly instructions are for your reference. And will show you how to assemble this designed kid swing.
ESSENTIAL INFORMATION
– Recommended for children 3+ years
– Do not leave the unattended child while in use
– CAUTION: Use only under adult supervision
– Good safety practices should be followed at all times
– Read all instructions before using this product.
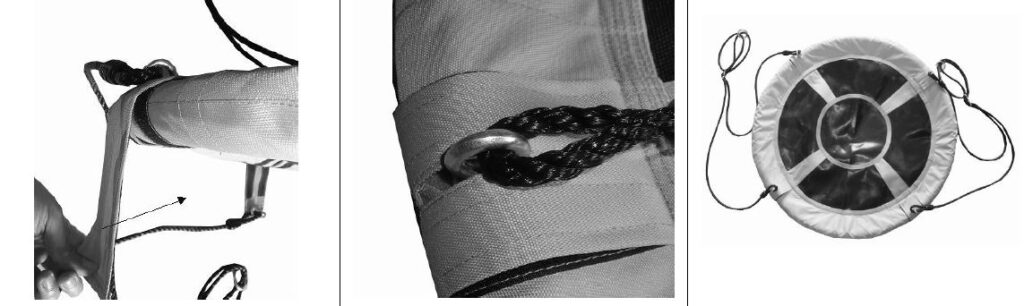
Hanging hardware is not included. Ideally, the swing body should be hung over
grass, sand, wood chips, or other soft surfaces. Under no circumstances should it be hung over concrete, asphalt, or other hard surfaces. Distance from the ground should not exceed 40cm; the maximum fall height should not be more than 46cm. Two S hooks are attached to the rope to allow for adjustment of the rope length.
Please be sure to examine the ropes regularly. If the color of the rope has become pale, frays easily, or gives off a powdery material when rubbed between the fingers, we recommend you replace the rope.
Equipment should be hung in such a way that a distance of at least 200cm is clear on either side. It can be hung on an A-frame or swing set or on a tree limb of a diameter of at least 25cm.
WARNING! Small parts for assembly by an adult.
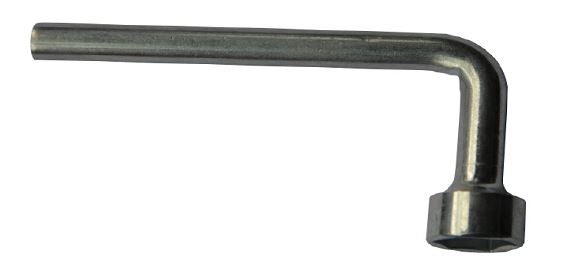
Tools Required (included in the packaging)
Kid Swing Assembling Steps:
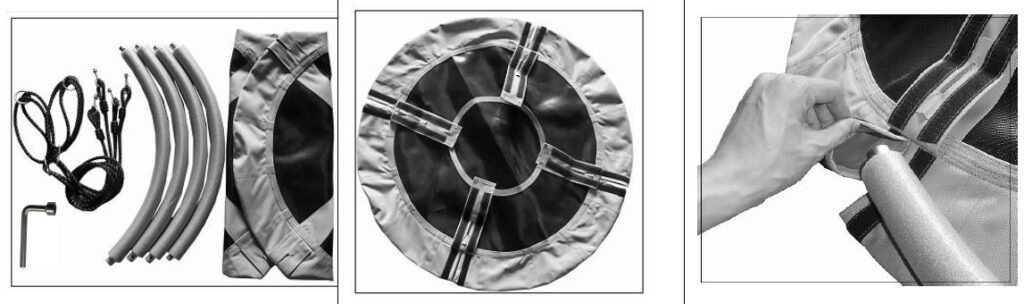
- Swings arrive in 4 pieces, two hanging ropes, and a jumping body for assembly.
- Put the jump body on the floor, and put the four sections in the black mat direction.
- Put the four metal tubes with foam into the sleeves one by one.

4. Put the tube like this.
5. Put the 2nd tube into the sleeve, a small socket to the big socket of the 1st tube, and connect it.
6. Repeat it, and make it half-folded as in the pic.
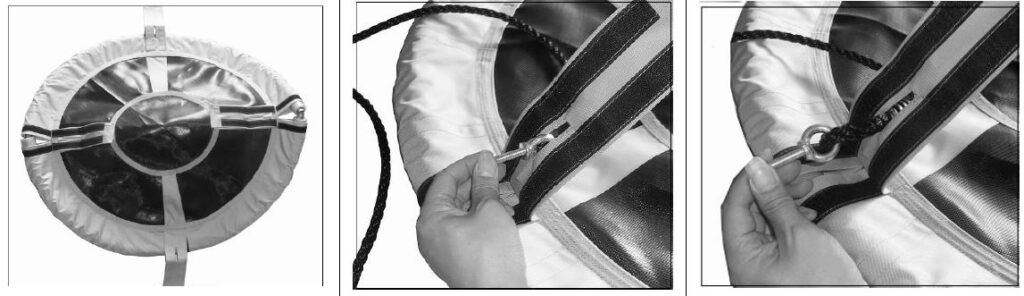
7. Then, connect the body around the platform.
8. Assemble the screw bolt, and first put it through the velcro belt.
9. Screw bolt goes through the velcro belt cover.

10. Assemble the screw bolt to the frame tube.
11. Tight it with a screw nut, do not forget the washer.
12. Use the wrench tight before use.
13. After the bolt assembly, cover the velcro belt and repeat three times on the other three bolts.
14. Tope looking and appearance.
15. Assemble, finish, and ready for swing.
After the kid swing is assembled, then your kid will enjoy a happy time!
